Hoppo Bumpo (n): A children's game. Played by folding one's arms and hopping on one leg. Aim is to bump opponents, so that they lose their balance. Last person standing wins.


Showing posts with label Tutorial. Show all posts

June 01, 2010

Tutorial: sew a personalised mouse mat


I recently asked the kids what they would like to give their dad for his birthday. They were quick off the mark with ideas. Bargy thought necklaces, whilst Argy was adamant it should be Star Wars. No, no ... Lego. No wait ... maybe Star Wars Lego.

While the necklace idea came and went, Argy continued incubating his Lego plan. Finally one afternoon he built a dazzling array of Lego vehicles and pronounced them all to be gifts. They were very intricate and rather good. But frankly there was no way the plastic engineering would survive more than a day or two. If Bargy found them, they'd be toast. In a rare moment of inspiration I grabbed my camera and recorded them for posterity.

Which is how the boys came to present their dad with a one-of-a-kind mouse mat depicting, amongst other things, a Lego tractor being driven by Darth Vadar.

Happy birthday, Mr HB!


PERSONALISED MOUSE MAT

Requirements
A digital image
Good quality printable cotton fabric for top of mat
Contrasting quilting or decorator weight fabric for reverse of mat
Heavy weight fusible interfacing
Batting
Matching thread
Scissors, iron, sewing machine

Instructions

  1. Print the image to your printable fabric, following the manufacturer's instructions.


  2. Take the printed and contrast fabrics and cut both to size - remember to include an allowance for hem turnings. (I cut mine to 24cm x 21cm [approx. 9½" x 8¼"] which included 1.5cm [approx. ⅝"] hem allowances.)

  3. Place the printed and contrast fabrics face down. Turn single fold hems on all sides. Press, then open the folds out again.

  4. Mitre the corners of the hems. (The dotted lines indicate the fold lines for the hems and the third diagram shows a trimmed corner). Press with an iron as you go.


  5. Cut two pieces of heavy-weight fusible interfacing and one or two pieces of batting to size. Their length and width should be about 2cm (approx. ¾") smaller all round, than your fabric.

  6. Fuse the pieces of heavyweight interfacing to the wrong sides of the printed and contrast fabrics. Make sure you centre the interfacing so that you have a 1cm (approx. ⅜") perimeter left clear for stitching the mat.

  7. Sandwich the batting between the printed fabric (face up) and the contrast fabric (face down). Match the edges of the fabric carefully.


  8. Staying as close as possible to the edge, machine sew around the perimeter of the mat.

    All finished!


    (And just in case there are moments at work when Darth Vadar is inappropriate, we have a flip side)

February 26, 2010

An alteration with a difference (or sewing for a plaster cast)


Life is full of surprises - and frankly its often the simplest things that prove the stumbling block.

Take Argy's double-layout-full-pike-with-twist accident, recently. By the time the inevitable plaster cast had been applied, I thought I had the son-has-a-broken-arm checklist sorted.

Sling. Check.
Garbage bag to cover arm in bath. Check.
Knitting needle for itching arm. Check.
Shoes with Velcro. Check.
Pillow to prop heavy arm up in bed. Check.
Food that is easy to eat left-handed when you are a right-hander.
Check.
Story to relay to strangers who stop and ask if it was a trampoline or clothesline (neither: stairs). Check.

Yes, I thought I had it all worked out. That was until the weather turned a little chilly.

I really didn't account for that. How does a 4 year old with an arm circumference of 12 inches wear a jacket or a sweater? I'm afraid the test was akin to that scene in Cinderella where the ugly sister tries to shoehorn her big foot into the dainty crystal slipper.

Poor Argy. I decided to make him something with big sleeves and a generous neckline.

Altering a long sleeved t-shirt pattern to accommodate a plaster cast

I started out by choosing a very simple pattern for a basic boy's long sleeved t-shirt. The pattern comprised just three pieces - a front, back and sleeve all cut on the fold. The pattern I used was by Kwik Sew and suitable for stretch fabrics only.


Creating a better neckline

Next I used the instructions from a tutorial by Dana of Made. Her terrific 90 minute shirt instructions describe how to convert a regular child's neckline to an envelope neckline. This is the sort that you see on baby onesies and really does make easing tricky arms into sleeves a lot simpler. Perfect for a broken arm ... though intended, I suspect, for much younger children (the neckline that is, not the broken arm!).

Whilst Dana drafts the alteration straight on to the pattern, I left mine as a separate piece for the time being. You see the two pieces for front and back, below.


Changing the sleeve size

The next task was to alter the sleeve size. I decided to add an insert of nice stretchy cotton ribbing into the middle of the sleeve. The pattern piece I drafted for the insert was a simple rectangle, as you can see below. I also changed the cutting instructions for the original sleeve from being "Cut 2 on the fold" to "Cut 4".


To be able to set in the much wider sleeve, I then made a change to size of the armscye (armhole) on the body of the top. To do this I added half the size of the finished insert (ie. excluding the seam allowance either side of the insert), at the shoulder seam of the front and back of the top.


Finally, I taped all the pattern pieces together for both the front and back. As you see below, the redrafted envelope neckline was taped on after I altered the armhole.


All that remained was to cut the fabric. I sewed the inserts into the sleeves first, then followed a combination of Dana's instructions and the original pattern for completing the remainder of the garment.

So hurrah - now Argy has a long-sleeved top that caters for a rigid bent arm weighing an extra one and half kilos!

And thankfully I haven't yet heard that question: does my ... er ... arm .... look big in this?

September 30, 2009

Tutorial: quick and easy decorated jar


Every time I finish a jar of something-or-the-other I carefully remove the label, wash the jar in hot soapy water and save it for jam making. I am the owner of a lot jars. And so very little jam.

I've decided to face up to the harsh reality that I am never going to make the indutrial quantities of jam needed to fill all those jars. Instead I am re-purposing some of the stockpile as storage.

Now as we know, homemade jam looks quite attractive in an old jar ... but a pile of dishwasher tablets, rubber bands or rechargable batteries tend to look a little less so. A little simple decoration with fabric and paint is in order!

Equipment and supplies
  • Old jar, washed and dried
  • Steel wool (preferably not the soapy type)
  • Acrylic paint
  • Paint brush
  • Fabric scraps
  • Modge Podge waterbased glue/sealer or similar product

Instructions

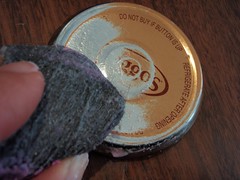
1. If your jar lid is painted, strip it back by rubbing it with steel wool.You might want to wear gloves as you may need to apply some pressure and steel wool can hurt your fingers. Take it from one who knows!


2. Using even brush strokes, apply 2 coats of paint to the inside of the jar. Allow drying time between coats and after finishing (I used a hair dryer to speed up the process - but remember to only do this in a well ventilated area).


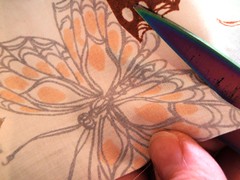
3. Cut motifs from your fabric. If you have partial prints at the fabric edge, these are perfect for lining up with the top or the bottom of the jar.

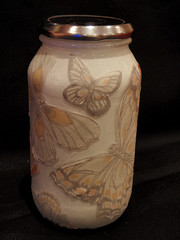
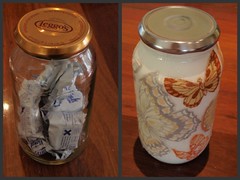
I have used a beautiful piece of vintage butterfly fabric (from here). Much better to have the butterflies prettying-up my kitchen than lying flat in a pile of fabric in the cupboard!


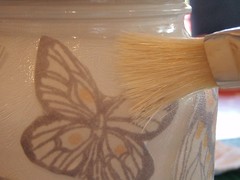
4. Hold the jar at its neck and cover the entire surface of the jar with sealant. Working quickly, arrange each motif on the jar, applying a good coat of sealant over the top. If you want a very smooth finish on the jar, make sure you even out the brush stokes over the whole surface, before the sealant starts to dry.


5. Allow the jar to dry fully. Depending upon what you wish to store in your jar, you may want to also seal the inside of the jar. This will prevent the paint chipping. Dry fully again before using the jar.

Now fill the jar and add the polished lid.

Before and after - a lovely jar for storing your knick-knacks.

Note: due to interior paint, not suitable for storing foodstuffs, permeable items such as soap or for full immersion in water

August 26, 2009

Tutorial: 3-by-3 kiddie canvas


This is the "pretty craft" fix I was craving last week. There's not even the merest hint of blue ... or a racing car ... or a muddy digger in sight. Flowers and pink fabric: just the tonic for the mother of two small boys!

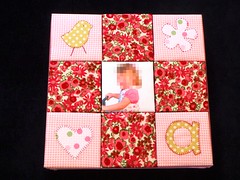
The picture is a gift for my 4 year-old niece, Miss Pink. Yep that's her in the middle; in all her pixelated glory.


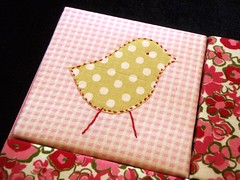
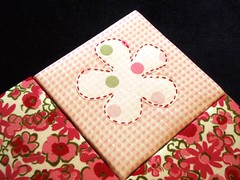
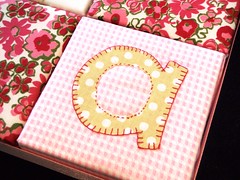
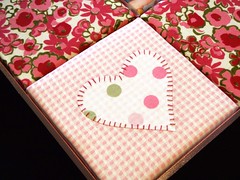
The picture is designed to be either free-standing or hung. The nine squares are individual canvases padded with batting and fabric. The corner designs are appliqued and the little girl's photo is inkjet-printed to a special cotton fabric. The canvases are secured with a plastic backing and then again around the perimeter with satin ribbon.


I loved using all the girly fabric and doing a bit of pretty applique. Please excuse Miss Pink's photo (I can assure you that in real life she looks a lot less pixelated) and the embroidery (which is so bad, that it should be pixelated).


If you would like to make something similar (or better!), I have posted a little tutorial.


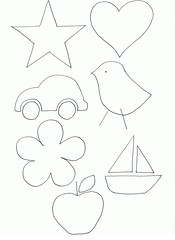
It has additional applique ideas, including those that would be suitable for a boy.


You can view the tutorial online here (where there is also a PDF download available). Have fun - I'm sure your embroidery will be better than mine!

January 12, 2009

Tutorial: make a gadget wallet


Gadget (n):

1. Small mechanical or electronic device useful for a particular job. Often thought of as a novelty.

2. Small appliance costing an arm and a leg. Easily scratched or dented. Guaranteed to to be the subject of bitter recriminations. Always sold without a protective case.

Remain blameless. Keep the novelty alive. Avoid trashing a gadget.

Make your own protective wallet. A tutorial and pattern for this short project are available here (available both online and as a PDF for download).