Every time I finish a jar of something-or-the-other I carefully remove the label, wash the jar in hot soapy water and save it for jam making. I am the owner of a lot jars. And so very little jam.
I've decided to face up to the harsh reality that I am never going to make the indutrial quantities of jam needed to fill all those jars. Instead I am re-purposing some of the stockpile as storage.
Now as we know, homemade jam looks quite attractive in an old jar ... but a pile of dishwasher tablets, rubber bands or rechargable batteries tend to look a little less so. A little simple decoration with fabric and paint is in order!
Equipment and supplies
- Old jar, washed and dried
- Steel wool (preferably not the soapy type)
- Acrylic paint
- Paint brush
- Fabric scraps
- Modge Podge waterbased glue/sealer or similar product
Instructions
1. If your jar lid is painted, strip it back by rubbing it with steel wool.You might want to wear gloves as you may need to apply some pressure and steel wool can hurt your fingers. Take it from one who knows!
2. Using even brush strokes, apply 2 coats of paint to the inside of the jar. Allow drying time between coats and after finishing (I used a hair dryer to speed up the process - but remember to only do this in a well ventilated area).
3. Cut motifs from your fabric. If you have partial prints at the fabric edge, these are perfect for lining up with the top or the bottom of the jar.
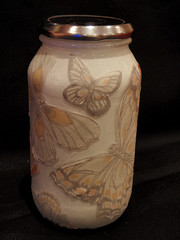
I have used a beautiful piece of vintage butterfly fabric (from here). Much better to have the butterflies prettying-up my kitchen than lying flat in a pile of fabric in the cupboard!
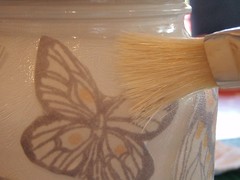
4. Hold the jar at its neck and cover the entire surface of the jar with sealant. Working quickly, arrange each motif on the jar, applying a good coat of sealant over the top. If you want a very smooth finish on the jar, make sure you even out the brush stokes over the whole surface, before the sealant starts to dry.
5. Allow the jar to dry fully. Depending upon what you wish to store in your jar, you may want to also seal the inside of the jar. This will prevent the paint chipping. Dry fully again before using the jar.
Now fill the jar and add the polished lid.
Before and after - a lovely jar for storing your knick-knacks.
Note: due to interior paint, not suitable for storing foodstuffs, permeable items such as soap or for full immersion in water


you are one crafty lady!
ReplyDeleteWho knew a Leggos jar could look so flash! What a clever, clever lady you are!! I adore the butterflies...and given that we are getting close to Christmas, these would make GREAT gifts!!
ReplyDeleteThat looks gorgeous! I do make a gazillion jars of jam every year but still i think I might have to buy extras this year just for decoration.
ReplyDeleteBeautiful jar Liesl. You have some great ideas!
ReplyDeleteGreat use of "rubbish". Good on you Liesl.
ReplyDeleteThey look fantastic Liesl. I however, definately do not have the patience to do something like that.
ReplyDeleteMore crafty cleverness. Looks much nicer covered in vintage butterflies.
ReplyDeleteI thought I recognised those butterflies!
ReplyDeleteHmmm I might need to start collecting jars again now. I used to collect them for ex-MrCP's bits and pieces in the garage.
very good idea :) I should do that to my pencil jars
ReplyDeleteWould you look at that!?!! I must do this... I am adding to my side bar "to do list" hehe The best part is I have all the tools ready so it will be done sooner than much much later.
ReplyDeletexo Steph
Nice work. Thanks for the tut!
ReplyDeleteBeautiful! but does the interior paint flake off over time?
ReplyDelete