Hoppo Bumpo (n): A children's game. Played by folding one's arms and hopping on one leg. Aim is to bump opponents, so that they lose their balance. Last person standing wins.


Showing posts with label Hems. Show all posts

June 08, 2009

Hem-along week 4 - blind hemming

Previously on hem-along:
Introduction
Week 1 - double fold hem (wovens)
Week 2 - single fold hem (wovens)
Week 3 - hemming stretch fabric

This week I tried out blind hemming. This lovely finish creates stitching which is virtually invisible on the right side of the fabric. It is used to hem garments, curtains and a wide range of other sewn projects. Read on to see how I used both hand and machine sewing to create blind hems.

Hand stitching

To begin I turned up the hem and pressed it and pinned it in place. I used a single fold, but you may choose a double fold. If you are using a single fold and the fabric is prone to ravelling it would be a good idea to overedge or overlock the hem edge first (in my example I use a selvedge edge).


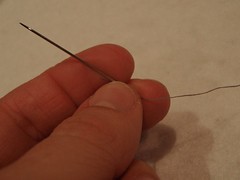
Next I threaded a needle with a single thread and knotted it at the end. Using a single thread helps reduce the visibility of the stitching on the right side of the fabric.


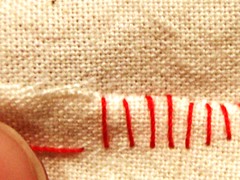
Next I gently rolled back the hem edge, anchored the the thread in the hem and then began stitching from right to left. Small stitches are taken in one layer of the fabric then the other.
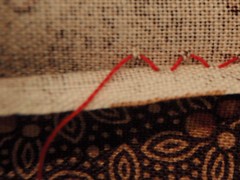


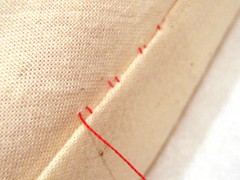
First a small horizontal stitch ...
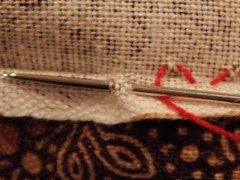


... then a tiny horizontal stitch, catching just a thread or two ... repeating this stitching pattern to the end of the hem. If this was a garment such as a skirt, I would overstitch every now and then to make sure that if a bit of the hem comes undone the whole thing doesn't come down!
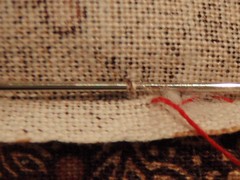


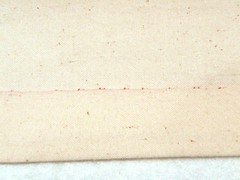
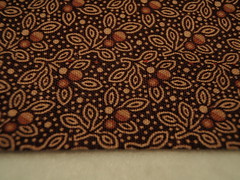
When I finished stitching I pressed the hem in place. Can you see the stitching?
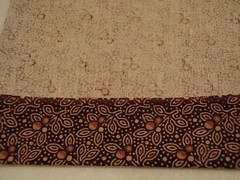


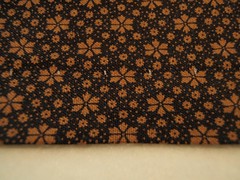
Its hard to see on the right side too!


Machine stitching

I really should preface the next part of my experiment with the words: it didn't work like this the first time. Or the second or third!

I hadn't used my blind hem stitch foot before and really had to experiment to find the right settings. If you are new to blind hemming, I can highly recommend testing your blind hem foot on some scraps before tackling your project.

To begin, I turned up the hem and pressed it. I used a double fold, but you may choose just a single fold. If the fabric is prone to ravelling it would be a good idea to overedge or overlock the hem edge first.
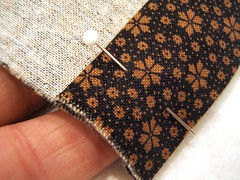


Now for a little trick: the edge of the hem needed to be rolled outward, exposing about a quarter of an inch. Like this ... (click on the pictures if you would like a close up)

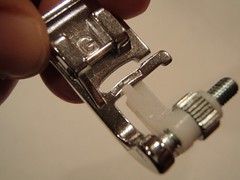
To blind hem stitch I needed to fit a special presser foot on my sewing machine.

Each brand of sewing machine has its own special foot. In the demonstration here, I have a Janome foot. (It has a white plastic guide which can be adjusted - wound in and out - using the silver screw). If you have a blind hem foot and it looks quite different, don't panic. There is plenty of variation in the appearance between makes and models - consult your sewing manual for the finer detail of how your foot works.

If you have an adjustable guide on your presser foot, you may need to experiment with its position.


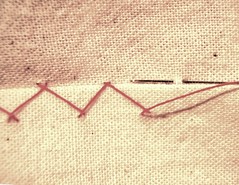
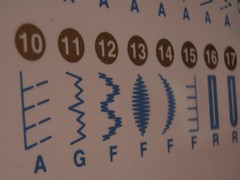
I also needed to select a special blind hem stitch. On my machine this is a repeating stitch pattern that has two short zigzags followed by one long zigzag. (In the picture below this is shown as stitch 11 on my sewing machine).

You might find that your sewing machines has a different style of repeating stitch - one that takes two straight stitches and then a zigzag.

Some sewing machines have both stitches. If you have this luxury, use the straight stitch for wovens and the zigzag for stretch fabric.

You may need to experiment with the stitch width to perfect your blind hem stitching.


Then I positioned the exposed hem under the presser foot. On my foot the white plastic guide aligns with the fold. Check your sewing machine manual for instructions for your presser foot.
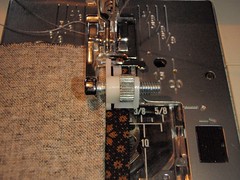


As I sewed I took care to just catch the left side of the hem with the long zigzag stitch. This part of the stitch shows on the outside of the hem, so it needs to be as small as possible.
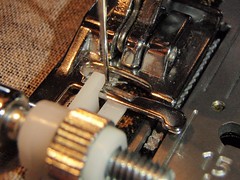


This is how the finished stitching looked. The long zigzag caught the left side by only a couple of millimetres.
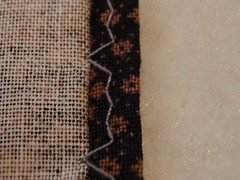


The next step was to roll the hem edge back inward. Like this ... (click on the pictures if you would like a close up)
After a quick press with the iron ....
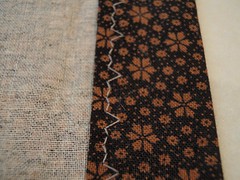


... the hem looked like this from the outside. You can see that if I used a matching thread, that it would be very difficult to see the stitching at all.


Conclusion

I really liked trying out both the hand and machine blind hemming and will use both again. In fact, I have already used the hand stitching technique again to finish a velvet skirt and a wool jacket. I'm looking forward to using the machine stitching on the next skirt I make.

Next time: A diversion to a garment-specific hem - the Euro or tricky hem for jeans. This magic technique shortens jeans, while preserving the original hem. After this I will be returning to general hemming techniques with rolled hems: by hand, machine sewing and overlocker.

May 16, 2009

Hem along week 3 - hemming stretch fabric

Previously on hem-along:
Introduction
Week 1 - double fold hem (wovens)
Week 2 - single fold hem (wovens)

This week I looked at how to create hems on stretch fabrics. Stretch fabrics behave a little differently to wovens, so I had fun trying out some new techniques.

The right notions


Before starting my experiments I put a new ballpoint needle on my sewing machine. Stretch fabrics are constructed differently to wovens and universal sewing machine needles tend to puncture the fibres. This can result in holes and runs in the fabric. A ballpoint needle is much better for stretch fabric, especially knits. It has a rounded tip that pushes the fibres apart without cutting them.

Next I threaded my machine with a polyester thread. Cotton is generally considered bad news for stretch fabrics – as the fabric stretches, it is liable to break. Stick with polyester.

Some people also swear by using woolly nylon in the machine bobbin. Woolly nylon is a type of thread generally used for overlocking (serging). Its a whispy, shiny thread which will stretch a bit.

I purchased some for this experiment (I found it located with the big overlocking thread spools at the haberdashery).


Most of my reading recommended winding the bobbin by hand to avoid overstretching the thread.


The raw edge

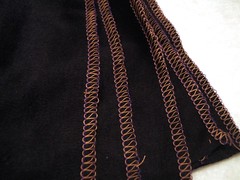
Stretch fabrics tend not to fray like wovens. If you do need to finish the raw edge the same methods I looked at in week 2 - zigzag, overlocked and hand overcast - would be suitable. This week I used a 3-thread overlock stitch on all my hem edges (below).


Choosing the right finish for the hem

Stretch fabrics typically have somewhere between 20 and 75% stretch (with Spandex even higher), so one of the main considerations is to choose a finish that allows the hem the right amount of "give". This means considering how stretchy the fabric is, as well as where the hem is placed.

A skirt hem on a low stretch fabric, for example, won’t need as much “give” as say, the neckline on a very stretchy fabric. A different technique can be used with each. I’ve looked at 4 possibilities below.

In the illustrations below I used a bit of very cheap remnant that I picked up in a discount store. This poly-blend, one-way stretch fabric was probably the nastiest I have ever used. It was horrible to sew on, had poor recovery after being stretched and actually frayed. Urggh!

Straight stitch

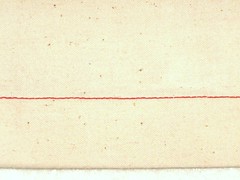
The first possibility is to take up the hem with a single line of straight stitching. It’s an option that is not suited to all hems. Straight stitching has little “give” so its best used where the fabric has lower stretch and the hemline doesn’t need to stretch too much.

In my example below I overedged the raw edge, then turned and lightly pressed the hem and secured it with a line of straight stitch

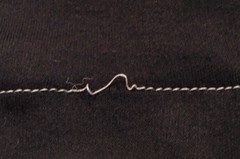
Then the stretch test. Oh dear - immediate breakage!


The greater the stretch, the more thread – and therefore stitches - you need. Too few and your stitching will snap like mine did. You can increase the number of stitches by reducing the stitch size.

The hem performed a little better after I reduced the stitch size considerably (see below). And even better with the addition of woolly nylon thread in the bobbin. It still wasn't very stretchy, but there weren't any more breakages.


Zig-zag

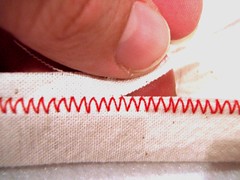
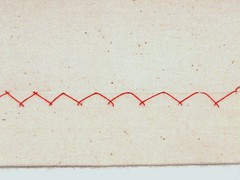
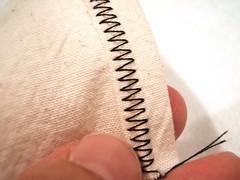
Most modern sewing machines have stitches that are specifically designed for stretch fabrics (for example, “lightening” stitch). You can however simply use a plain old zigzag stitch, which I tried below.


Again, I over-edged the raw edge, turned and pressed the hem and then stitched. The zigzag has built-in "give" in it. At the extreme when stretched to its fullest extent the stitch would start to look straight.


The zig-zag stitching survived the stretch test well. Woolly nylon performed slightly better in the bobbin than regular thread, but both stretched well.

Coverstitch

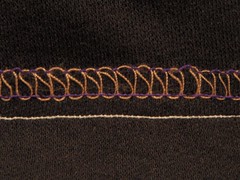
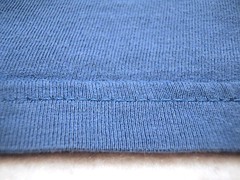
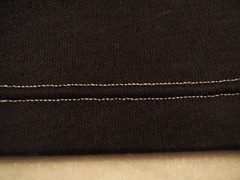
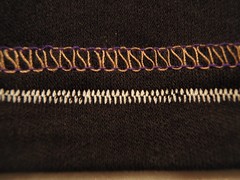
Are you wearing a t-shirt? Take a look at the hem. Chances are that it has been finished with a coverstitch. It comprises two or three lines of parallel topstitching on the outside ....


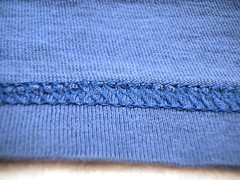
... and an overlock stitch over the raw edge on the inside.


This stitch is used widely in the commercial world. To use it in home sewing you need a special machine – either a coverstitch machine or an overlocker (serger) with a coverstitch option. Many of the higher-end (read: expensive!) overlockers also provide this special stitching.

Sadly my overlocker cannot coverstitch. However, there is something you can do with a regular sewing machine to create a “faux” coverstitch. Read on!

Twin needle

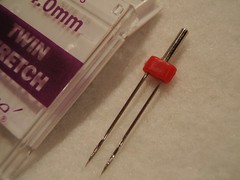
A twin needle can be used to create a double row of top stitching on your hem. As the name would suggest, this clever gadget has two needles sitting side-by-side on the one shank.


You simply pop it on your sewing machine, add a second spool of thread and thread both needles. Et voila: you’re ready to sew two perfectly spaced lines of straight stitch. (You may need to consult your sewing machine manual about adding the second spool).


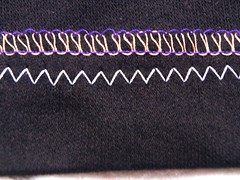
Like all things faux, once you look a little deeper, you will see that the stitching isn’t really quite like a coverstitch at all. Instead of overlocking on the underside, there is zigzag stitch running between the topstitching. This zigzag is, however, beneficial as it allows a bit of stretch in the hem.


Note: It is possible for the two threads to get tangled and break during sewing. It can get UGLY! To minimise the chance of this happening, pass the thread down separate sides of the little tension disc near the top of the machine, when you are threading. Try also to sit the reels on the spool pin so one winds clockwise and the other, anti-clockwise.

Averting disasters

Tip #1 – if possible, try sewing on a scrap of fabric first, to see how your stretch fabric will behave

Tip #2 – if you are using a very fine stretch fabric and the twin needle starts to create an ugly ridge effect, the fabric is slipping. Try adding some fusible hemming tape inside the hem before stitching.

Tip #3 – if your stitching looks puckered, try putting a piece of tissue paper above and below the fabric while you stitch. This will help the fabric glide under the presser foot and avoid it being dragged down into the needle plate. Tear the paper away when you have finished.

Conclusion

After this experiment, I wouldn't bother too much with straight stitch - it really isn't forgiving enough. Both the zig-zag and twin needle stitching worked well. I really like using the twin needle – I think it creates the nicest of all the sewing machine finishes. Of course, I could always keep the coverstitch machine on the wish list ...

Next time: Next time on hem-along, I will be looking at how to blind hem by both hand and machine.

April 22, 2009

Hem along week 2 - single fold hem (woven fabric)

Previously on hem-along...
Introduction
Week 1 - basic double fold hem for woven fabric

Single-fold hems

Welcome to my continuing experiments in hem-along. This week I looked at creating single fold hems on woven fabrics.

This type of simple hem is produced by folding the up the allowance once to the wrong side of the fabric. Single-fold hems are good for a range of different weight fabrics, including heavier ones where a double fold hem would be too obvious or bulky.

To create the hem below, I made a turn then lightly pressed the fold. (The hem depth that you choose will depend upon your project.) To hold the hem before securing it with stitching, you need to either pin or baste the hem in place.


The raw edge

When using a single fold hem, the raw edge of the fabric remains exposed. (By contrast, a double-fold hem encloses the raw edge in the folds).

Now if the fabric edge is a selvedge or the fabric is not prone to ravelling, all you need to do is fold, then stitch the hem. Fabrics such as knits and non-wovens (e.g. suede, felt) tend not to fray when cut. Wovens - which I was looking at this week - generally fray to some degree on any cut edge. The looser the weave the greater the amount of fraying. I once had a piece of linen that fell apart if you took a sideways glance at it!

When the fabric is prone to ravelling, then the hem edge needs to be finished in some manner to prevent fraying.

One method is to use a zig-zag machine stitch. In the example below I stitched parallel to the raw edge of the fabric and then used sharp scissors to cut close to the stitching to remove the excess (ravelling) fabric. When you do this, its best to test the zig-zagging on a scrap of material to make sure the length and width is suitable. The wrong settings can produce a stitch that gathers your fabric into an ugly little ridge. After zig-zagging, you can then secure the hem by hand or machine.


If you have an overlocker you can serge along the raw edge, before securing the hem by machine or hand. A three-thread stitch will finish the edge securely. In the example below, I'm afraid I have been a wee bit lazy. I already had four threads set up on the overlocker (used for overedging and stitching a seam in one go) and couldn't be bothered taking out the left-hand needle. So instead we have a four-thread stitch.


If you would like to finish the raw edge by hand, you can use an overcast stitch. This is an evenly spaced diagonal stitch that runs across the raw edge of the fabric. The more prone your fabric is to ravelling, then the closer together the stitches.

Of course, if your hand stitching looks anything like my oddly-spaced, strangely-vertical stitching below, you may prefer to use your sewing machine. (I should be too ashamed to show you this picture, but I thought I'd leave it in for its comedic value!)


Securing the hem

To secure the hem, you can use either machine or hand stitching. There are also some "quick-and-dirty" sewing-free ways of securing a hem, which I have covered a bit further on.

You may choose to secure your hem by machine with top-stitching. Below is an example of top stitching, which I tried last week. To see how to do this in more detail, click here.


Alternately, you may wish to secure the hem by hand. A good stitch for securing the hem (after finishing the edge) is a catch stitch. Below is an example of catch stitching, which I also tried last week. To see how to do this in more detail, click here.


Another neat solution combines the finishing and securing in one step, using a machine zig zag stitch. You do this by stitching the turned up hem, then trimming the excess fabric back close to the stitching.


Cheat's methods
Here they are. Shortcuts for securing a hem: the good, the bad and the ugly. The no-sew solutions to hemming. Use them as you will ... I wont tell, if you don't.


From top to bottom: [1] Double-sided bonding tape,
[2] Iron-on hemming web and [3] Hemming tape

  1. Double-sided bonding tape
    This sturdy, clear adhesive tape joins the fabric together. No sewing or ironing is needed. The tape is placed on the inside of the fold and is not visible. The raw edge of the fabric remains exposed.
  2. Iron-on hemming web
    This cobweb-like, fusible tape joins fabric together. The web is placed on the inside of the fold and is not visible. No sewing is needed. The webbing fuses using the heat of an iron. The raw edge of the fabric remains exposed.

  3. Hemming tape - this mesh tape is ironed over the top of the hem edge. After moistening the tape, it is placed white-side down over the hem edge and ironed in place. The tape is visible, but the raw edge of the fabric is covered.
For a completely no-sew solution, the hemming tape is probably best as it hides the raw edge. The downside is its quite visible. As you can see below, I used a meshy, synthetic type tape, but it is possible to buy variations that include fusible bias cut fabric tape.


The fusible webbing is less visible and would work as a no-sew solution on fabrics that aren't prone to fraying

And the double-sided adhesive tape? Hmmm - what to say? Ah, how about: I wished I had discovered this years ago when I was wasting perfectly good staples on hems? It has to be the quickest way possible to secure a hem. Its not pretty, but does the job ... kind of. It does produce quite a stiffly finished hem. Does anyone know if that tape ever stands up to laundering or ironing?

Conclusion

I would love to have the skill and patience to hand overcast a hem edge, but suspect I will be content to stay with zig zagging and overlocking. I was, however, excited to discover the all-in-one zig zag finish and stitch. Now to find a place to use it!

Next time: I am moving from woven fabrics to stretchy fabrics. Come back to see my s-t-r-e-t-c-h-y hemming experiments.

April 08, 2009

Hem along week 1 - basic double fold hem (woven fabrics)

Some background about hem-along ...
Introduction

Preface

Whether a sewer or not, most us have been faced with a hem at some point. Who hasn't had to do something with a hem that has come down? Or shorten a garment? I suspect this is why hilarious stories of make-shift hemming solutions seem to spill out so readily. I'll personally admit to stapling, taping and pinning in the past. And then - when I became a little more sophisticated - to the extensive use of iron-on tape.

This week was the first in my hem-along and I decided to start with the most basic of techniques - the turned and stitched hem. But you know, after years as a serial stapler, it came as a great surprise to discover many variations on the humble folded hem. So many, in fact, that I thought it best to look at the different possibilities in detail across the next couple of weeks.

So this week, I decided to focus just on how to hem a straight line on woven fabric using a double fold hem. In the coming two weeks I will look at single fold hems on woven fabrics and then some good techniques for hemming a stretchy fabric. Later I will also look at hemming curves.

Read on to see my double-fold experiments using machine and hand sewing.

Double-folding a hem

This type of hem is created by folding the up the hem allowance twice. This hides the raw edge of the fabric in the fold.

It creates a simple, durable hem best suited to light (but not sheer) to medium-weight fabrics. The folds create some weight at the hemline. (If your hem is going to become bulky or heavy when the fabric is turned twice, it would be better to use a single fold, which I will be looking at next week.)

To create the hem below, I made the first turn then lightly pressed the fold. After this I made the second turn and lightly pressed the fold.


The depth of the double-folded hem will depend on your project.

If you are making a garment like a dress, you'll find that the skirt hem is much deeper than say the hem on the sleeve. If you are using a commercial pattern, there will probably be guidance about the size of the first and second folds for each hem. The first fold is, however, generally shallower than the second. This minimises the bulk in the hem.

To hold the folds in place, you can see below that I pinned the hem.


You can also baste (temporarily tack with a long hand stitches) the hem. There are some instances (that I will look at in coming weeks - for example, curved hems) where it is better to hold the hem in place with basting rather than pins.

Securing the hem by hand

Most of the hems I have sewn in the past have been by machine, so it was good to try out some new hand stitches. When you catch a hem by hand, the stitching is less visible than machining.

There are a number of hand stitches that can be used for hemming. Some of the common ones are blind hem stitch, catch stitch and slip stitch. I will be looking at blind hemming by hand and machine in a separate experiment, so this week I tried out catch and slip stitch.

For each of the stitches, I used just a single thread in the needle. The thread was secured at the start and end of the stitching with a knot in the fold.

Catch stitch

Catch stitch criss-crosses the length of the hem. You use small stitches to catch fabric both above and below the folded edge. This is a nice secure stitch, which has a little bit of "give" in it. A little movement in the hemline makes the hem look soft.


If you use a matching thread, the stitch will be barely visible on the right side of the fabric. The stitches you can see below are the small stitches taken above the fold.


When using catch stitch you sew from the left to the right along the hemline. The stitch is worked by catching a small stitch (right to left) in the fold and then moving diagonally up to catch a small stitch (right to left) above the fold. In the example below I am about to pull the needle to the left and then move diagonally back down to the fold again.


Now this is quite a straight forward stitch, but hand stitching really is not my forte. I had a little trouble catching-on initially and picked up some of the stitches in the wrong direction. I found it a little easier when I remembered that I was essentially sewing in a figure 8 with the top and bottom of the 8 being where I should take the stitch.

Slip stitch

Next I tried slip stitch. It is created by taking a little stitch above the fold and then a longer stitch that tunnels through the fold. This is also a nice sturdy stitch, but has a bit less "give" than the catch stitch. It is, however, less visible from the wrong side of the fabric than the catch stitch, as you can see below ...


... but looks similar on the right side of the fabric. Once again if you used a matching thread the stitches would be almost invisible. And again, the little stitches you can see are the ones that have been taken above the fold.


When using with slip stitch you sew from the right to left along the hemline. The stitch is worked by using the fold as a little tunnel. You start by taking a "tunnelling" stitch to left in the fold and then bring the needle out and take a little stitch (right to left) above the fold. Then you take the needle down into the fold and move left again.

In the example below, I have loosened off the stitching slightly to show you what is happening. I am about to take the needle back down into the fold again.


So its an along-up-across-down-along sort of pattern.

Securing the hem by machine

Machine stitching is a quick way of securing the hem and produces a very durable, even stitch. The stitching is generally visible from the right side of the fabric - even when you use a matching thread. For this reason, this type of hem is often referred to as a "top-stitched" hem.

Top stitching is always done on the right side of the fabric, so strictly speaking, you should sew the hem from the outside of the garment. The catch is that you need to be quite sure that you are securing the hem up all the way round with your stitching. There is not much point in having a line of beautiful top stitching if its not actually fastening the hem.

Given this, some people choose to sew on the wrong side of the garment. I'll admit it ... I am one of those people! If you are going to do this, you need to make sure that you are also sewing parallel to bottom of the hem, otherwise your stitching is going to look all wobbly from the outside.

Here is my hem secured with machine stitching.


Additional tips

#1 If you have any vertical seams intersecting with your hem, they will create extra bulk in your hem. The heavier your fabric the more pronounced the effect. Instead of the double fold hem having three thickness, it will have six! Before you begin sewing you could take out a little bit of bulk by cutting the seam allowance to about half its size (you can read more about "grading" a seam here).


#2 If you are hand sewing, its a good idea to create a knot every now and then as you are stitching. This means if the hem starts to come down later, it will only undo up to the knot. This way you won't have to re-stitch a whole hem!

Conclusion

Before this experiment I rarely hemmed by hand. I shied away from the whole idea, thinking it was too difficult. Securing a hem by machine has always seemed like the quickest, easiest and safest thing to do. However, after trying the catch and slip stitches, machine stitching seemed so heavy and obvious. I think I might be a convert!

Next week: I will be looking at single fold hems and how you finish the raw edge of the hem. I will be using both the sewing machine and hand sewing. And ... shhhhh, don't tell anyone .... but I might even dabble with a cheat's no-sew hem or two.