
I can happily report this week, that I haven't yet botched stencilling. (Of course by dedicating a week to locating supplies and reading tutorials, I have probably cleverly kept myself out of harm's way. Let's wait and see what happens next week).
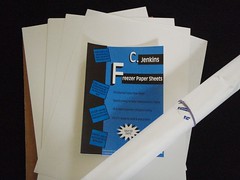
The freezer paper turned up nice and promptly yesterday from Punch With Judy. I ordered two brands for comparison: Reynold's (which is on a roll) and C. Jenkin's which comes in pre-cut sheets. It will be interesting to see if there is any difference when I use them. The Reynolds paper seems a little thinner and waxier and might be a little more transparent for tracing. The C. Jenkin's paper is labelled as being "industrial", which sounds awfully promising (I'm a sucker for a good adjective). It will also be easier to store, as its flat.
Over the past few days I've been reading through the tutorial links that I posted last week and have done a little extra browsing through places like Flickr, where people have posted pictures and explanations of their stencilling. If you are interested in stencilling too and haven't yet had time to do some reading, here is a brief summary.
Stencilling process- Trace your design onto the freezer paper
- Cut out the design
- Using an iron, fuse the freezer paper to your fabric
- If you are stencilling onto a garment, place a piece of cardboard or another piece of freezer paper, shiny-side up between the fabric layers to prevent bleeding
- Apply the paint within the cut-away stencil
- Dry the fabric
- Peel away the stencil
- Heat set the paint
- If you are looking for inspiration, there are a lot of free stencils on the Internet
- Trace your design onto the matte side of the paper
- Decide whether you are going to have any floating pieces within the cut-out, as these will need to be cut away and carefully saved
- Use a craft knife or small scissors to cut out the design
- If you use a knife, you will also need a cutting mat
- Keep a large border around the stencil, to avoid stray paint getting onto your fabric
Fusing the paper
- It is best to have washed and dried your garment prior to stencilling
- Place the paper shiny side down
- Arrange and line-up any floating pieces carefully
- Iron the paper for about 30 seconds
- Make sure the steam setting on your iron is off
- Look for a thick paint, to avoid bleeding
- Some people recommend Speedball brand screen painting ink
- Use a sponge or a stiff brush to apply the paint
- Take care to apply the paint right into the weave of the fabric
- Take care with applying the paint into any details on your design, such as points
Drying the stencil
- Allow 4 - 6 hours for drying
- You might like to use a hair dryer to speed up the process
- If you don't allow enough time for the paint to dry, it may peel away with the paper
- For best results, be guided the manufacturers instructions on your fabric paint
- However ... here are some additional tips I have seen for setting the stencil:
- cover the stencil with an old tea-towel, or other piece of fabric, and iron
- cover the stencil with a new piece of freezer paper and iron
- iron the stencil on its reverse side
- tumble-dry on a low setting
I have decided to start out with a very simple design. I would like to make Argy and Bargy some Christmas t-shirts with trees on them. With my craft track record and only 98 days left, I don't have a moment to waste. (Don't laugh - remember the crochet?) Anyway, I thought I might stencil on the tree and then stitch on some decorations (will Mr HB notice sequins on his boys?). The sloth in me is pointing me toward downloading a design, but my conscience (knowing that long, long ago I used to be able to do some passable drawings) tells me not to be so lazy. Let's see which little inner voice wins.
So during this next week, I am going to:
- Sketch my design
- Trace it onto both the Reynolds and C. Jenkins freezer paper
- Test run the stencils on some calico
- If time permits, wash and dry the test stencils to check out their durability (wash durability is a very important factor over here at Hoppo Bumpo's House of Putrid Children)
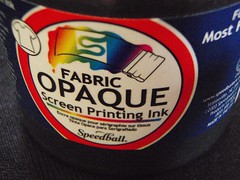
I will be using the beautiful Speedball Opaque Screen Printing Ink in Black Pearl, that I picked up a couple of weeks ago at Riot Art and Craft. I'll let you know next time if (with my amateur eyes) I see any particular differences between the performance of the Reynolds and C. Jenkin's papers.
If you are stencilling along, how have you gone this week? Did you manage to find some freezer paper? (If you'd like other people to see what you're up to, leave a comment and I'll pop your name into the sidebar.)


oh wow, synchronicity....I've just been to the post office to pick up my Freezer Paper after searching everywhere for it and finally ordering it online through ozQuilts. I hope to be stencilling along very soon. Now I'm going back to read your post again. Good luck stencilling.
ReplyDeleteI've marked this post!
ReplyDeleteThanks for all those explanations. Someday I'll try. Just now I only have the freezer paper...
I'm not stenciling along but I am intrigued. Looking forward to seeing your progress.
ReplyDeleteDoes this mean your crochet is gone for good?
The poor old crochet is still on the go .... just really slowly. I still have (deluded) aspirations of making a rug!
ReplyDeleteI have always wanted to have a go at this! I am following your progress with interest. Christmas T shirts sound great. I have Reynolds paper from when I went through an applique phase so am hoping you will find that brand satisfactory!!
ReplyDeleteI'll be watching as my freezer paper is still sailing towards me (I hope). I did an analog stencil recently using a bit of vinyl fabric & it worked fairly well considering.
ReplyDeleteI'll be working on my stencil until it arrives......actually that's not so likely....but I'll be thinking of what to print.
Thanks for the summary.
Jeepers, I am at the back of the class, I still haven't got my freezer paper. I better get cracking!
ReplyDeleteI am so into this stencil along - I worked on some designs last night in front of Make me a Super Model and am really looking forward to getting down and very dirty with the ink. I hope you dont mind but I have stolen your stencil to do list (again!) - it worked so well last week.
ReplyDeleteI think you should do your own designs, I think it will be more satisfying. But hey I understand the concept of time poor!
Good luck HB - cant wait to see what we all come up with.
Steam! Well, stap me vitals, I bet that's why my freezer paper doesn't stick to the fabric. The steam setting is permanently on my iron until it runs out of water.
ReplyDeleteCount me in, now I reckon I'll give this stencil larky a go.
oooh, I'm _definitely_ joining in. Now to find a clean shirt, hmmm....
ReplyDeleteI'm in. I've just decided on my first design and I'm hoping I'm not being overly ambitious! hahaha, will see how we go... thanks again!
ReplyDelete