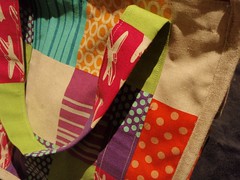
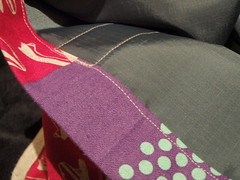
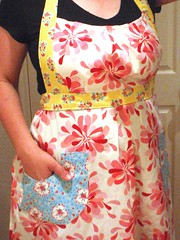
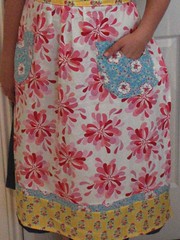
Previously on seam-along ...
IntroductionWeek 1 - Simple edge finishesWeek 2 - French seamsWeek 3 - Bound seamsWeek 4 - Flat fell seamsWeek 5 - Taped (stabilised) seamsThis week I looked at
overlocking - or
serging - seams. I tried a couple of methods that create super-fast, beautifully neat seam finishes.
If you don't own an
overlocker (
serger), don't tune out just yet, as I also tested out a sewing machine alternative, just for you!
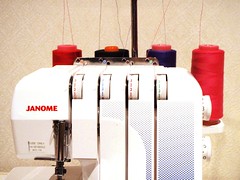
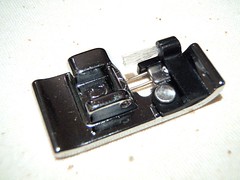
OverlockingIf you're not overly familiar with an
overlocker, they really are an amazing piece of gadgetry.
Home
overlocking (
serging) machines generally have two needles and two
loopers that create an intertwined stitch using up to four threads. All the thread is spooled from the top of the machine. As a stitch is created, the
overlocker also trims away the excess fabric to the right, leaving your seam with a line of perfectly
overedged stitching.
Overlockers also sew exceptionally quickly - about 1500 stitches per minute - so are much faster than a conventional sewing machine.
While
overlockers can do many and varied things, this week I decided to look at two very basic finishes: the three and four thread stitches.
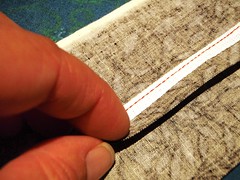
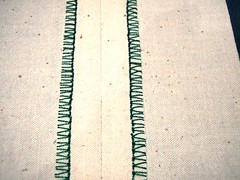
3-thread overlock finishTo begin, I matched the right sides of the fabric together and sewed a plain seam using my regular sewing machine.

Next I opened out the seam allowance and moved to the
overlocker. A three-thread stitch needs only one needle, so next I unscrewed and removed the left-hand needle from the machine. I then passed the edge of both seam allowances through the
overlocker. The seam below has been
overlocked and neatly pressed open.
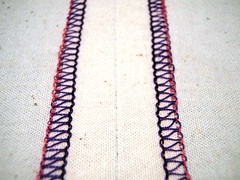
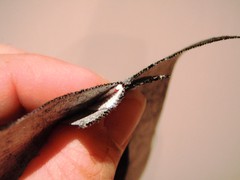
This three-thread stitch is good for neatening seam edges. If you would like to see the stitching in more detail, I have created a notated picture over
here. It explains which parts of the stitching has been created by the needle and each of the
loopers.
Rather than opening out the seam you may prefer to stitch the two sides of the seam allowance together and press it to one side. I have done this in the example below. I have flipped it up at the edge closest to you, so that you can see the underside of the stitching.
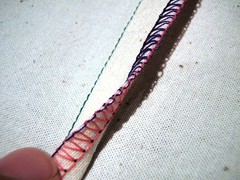
If you think you might need to alter your seams at any stage, it is a good idea to try and sew very close to the edge of the allowance, so as not to remove to much of the fabric. If this is not an issue, then you can stitch quite close to the original seam line and the
overlocker will trim most of the seam allowance off.
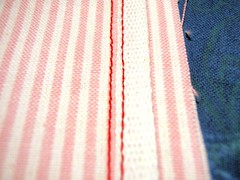
4-thread overlock stitchA four-thread stitch sews the seam, as well
overedging and trimming the seam allowance off. When you use this type of stitch, you don't need to create a seam with your sewing machine first.
To create the 4 thread stitching, I attached the left-hand needle to the machine again. Next I placed the right sides of the fabric together and then passed the fabric through the
overlocker.
When you use two needles, an additional line of stitching is added. If you look at the photograph below you might (just!) see a red line of stitching running along the left. This is the seam. All the other parts of the stitching (purple, pink and black) form the
overedging.

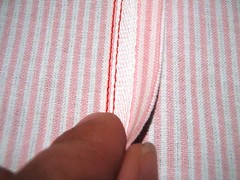
In the example below I have flipped the seam up, so that you can see the underside.
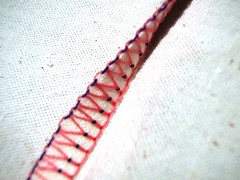
This type of seam is pressed flat to one side. The top side of the seam should be side that had been upper-most when you were stitching.
Faux overlocking - using your sewing machineNow what if you don't have an
overlocker? The good news is some sewing machines come with stitches and presser feet that will approximate an
overlocked stitch. The stitch construction is of course more basic than a proper
overlocked stitch (as there is just one needle and bobbin) and the machine cannot trim the excess fabric. That said, you can still produce a nice finish.
For this experiment, I purchased an
overedge foot for my
Janome sewing machine (DC3018), then after consulting my manual selected an overcast stitch. You will need to consult the manual for your particular make and model of sewing machine to see if you can do something similar. I'm assuming that the older and more basic your machine is, the less likely you will be able to do this.
To begin I placed the right sides of my fabric together, then sewed a plain seam. After this I opened out the seam, then sewed using the overcast stitch down both sides of the seam allowance.
The result looks (to the untrained eye and from a distance!) not dissimilar to a real
overlocked stitch. It is a very neat finish. The manual for my sewing machine explains that this particular stitch can be used to seam and
overedge at the same time - much like the 4-thread stitch on the
overlocker.
 Conclusion
I haven't owned an
overlocker for very long, so I am still learning how to make the best use of it capabilities. I am also trying to overcome my gross incompetence at threading, which has created more problems than I'd care count! That aside, I do love the beautiful neat and very quick finish that the
overlocker gives. If you do a lot of sewing, they are awfully handy.
But I am also quite impressed with the nice finish that the sewing machine gives too. I'd have to say that I will be tempted to use this on the
occasions when the
overlocker and I are not on speaking terms!
Have you been seaming-along? Which is your favourite?
Next Wednesday: Stay tuned next week, when I will be investigating how to finish seams that are getting too bulky. Read more about bulky seams via Google.